Lyptus Custom Cabinets Katy, TX
Next part sequence of the curve brace of the cabinet maker's custom cabinets is after I have just inaugurated my curve from the 45s I cut earlier. But first when the cabinet maker was composing this brace for the custom cabinets the smaller sample, that I lectured about from before, I have to use to draw on my router so I know where to make my cut on it so it adds to my router section of my brace. When making the 45 angles on the lower side of my router I want to go ahead and get it as close to my curve that I drew as possible because this is the back of my custom cabinets. I see here that I have extra room because I drew the 45 first so I am going to go ahead and extend it to a 55 degree angle to give me less work later on. I pretty much want to get as much wood off as I can without interfering with the curve itself. Now if I hold the two pieces up I can start to see how it gets rounded off which makes the back of the custom cabinets look smooth. Next I am going to cut two more 45s on the top of my inside curve on both ends. The next thing I am going to do is attach my face frame of my custom cabinets to the router or middle piece of my curve. What I have to do now is join the inside curve with the router of the curve. The way I am going to join them together is I am going to find the center of the area in which they attach and mark it with a pencil and then I am going to drill some pilot holes all the way through. I am going to do this about every three or four inches all the way down my custom cabinets. Then after I go the one way with it I am going to counter sink the holes. I make sure to use my stop collar so I don’t go to deep. Up at the top I make two holes back to back. Now I am ready to attach the two parts to the back of my custom cabinets together. When I attach it I first glue it then I come back around to screw it in. Before I glue it though I first screw one all the way threw so I have a way to line up both pieces of my custom cabinets. Now the reason why I put two screws in at the top right next to each other is because the bottom screw is going to screw into the inside curve and the other one is going to screw into the back of the custom cabinets. Any extra wood that comes off the top you can sand down later make sure to give myself extra wood on the inside curve part because it is easier to sand down that side rather than the router side.
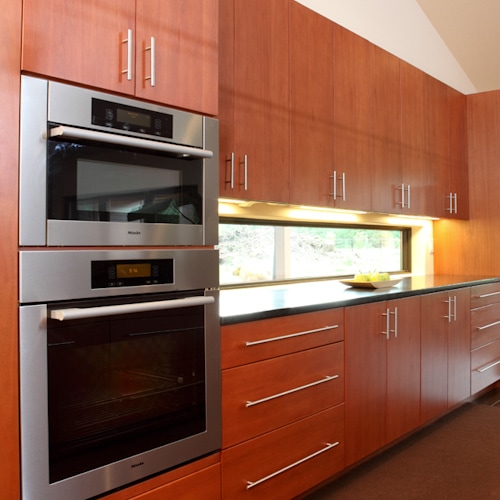
"I have to say I applaud every part of my custom cabinets. My nice European Kitchen looks very modern and transformed my living space as well. The cabinet maker and designer did a amazing job drawing out and walking me through the steps. I go my cabinets for a competitive price and my wife is more then happy." Keith - Katy, TX
"I needed custom work done on my kitchen because of the specific needs I had. The remodel that Cabinets of Katy accomplished in such a short time was very relieving." Chase - Katy, TX
Hickory