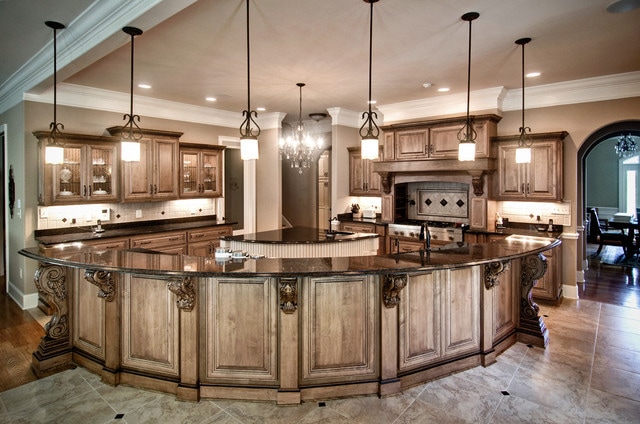
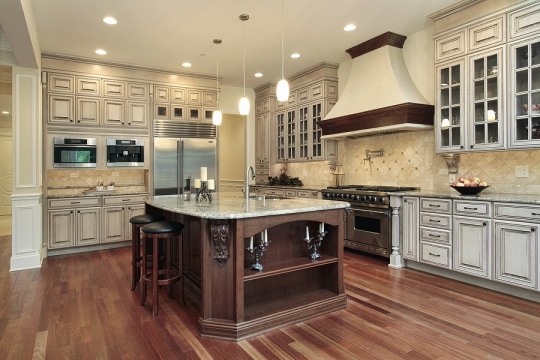
When I am building kitchen custom cabinets, it starts with that first cut. This amazing layout out of Katy, TX is something we can be proud of. I start with the help of a saw and a custom cabinet stand to make my first cut. Then I reset the wood on the stand and reverse and make the cut from the other side. I need to set up the wood so I can cut the edge that will allow for the custom cabinet wood to connect. Then I grab both sides and cut a rabbit on each end. I use glue to join the boards to shape the frame of the custom cabinets. Then use clamps until it dries. I do the same thing for the inner walls of custom cabinets. I use a square on both sides of the walls to make sure the structure of the custom cabinets are strait. Then I start on the face frame. I use a table saw to rip strips and a miter saw to cut it into pieces. I drill a pocket hole into each end of the styles then I start attaching it together. I measure out the styles and use the frame I previously connected as a guide to figure out the dimensions of the face of the cabinet. Then I start gluing the frame to the face of the custom cabinets by tracing on the corners using a counter sink bit and come back around with a screw. Before finishing with screws I make sure they're square. I only use screws on the top and bottom rails because I know I would come back around with molding but on the styles I use a nail gun to hold the face frame of the custom cabinets in place. Next I will start cutting the diagonal pieces for the drawers of the cabinets. I use a tape measure to make sure the left and right were spaced evenly. Then I attached it by using pocket whole I drilled in the back. Next I went threw and started adding the edge banding. First ironing it on the coming back around to clean it up. A chisel might make for quicker easier work. I use my blend of molding because I prefer it over the options you have at the store. For this example, I will use 2 by 6s and use a table saw to cut it down to desired size. I glue it to the custom cabinets and nailed it in place. Then I repeat the steps and make a slightly different mold for the center steps. Repeat the process for top mold except because these custom cabinets were a little taller I turned to 2 by 6 on its end and place it on a table saw to give it more support while I was cutting then glued it all together.
In this next article I am going to talk about the craftsmanship behind making good custom cabinets. In this paragraph I want to tell you some things that will help you in discerning what average custom cabinets are and what extraordinary custom cabinets are. First, let’s talk about casework if you take this display I have in front of me the casework is really the meat or structure of the cabinet. We really want to look for veneer core plywood for that case. If you have ever seen custom cabinets that blew up because of a water leak. Those were not New York custom cabinets. That was more than likely some melanine or particle board custom cabinets. I am not a fan of those kinds of custom cabinets. The next thing that I think separates really well-built custom cabinets is the drawer construction. I use mostly plywood drawers with a lock shoulder but another great option is to go to a hardwood drawer with dovetails like the one I have here. You want to try to avoid butt joints and melanine drawers on your custom cabinets. The next thing on my list is hardware. This basic hardware I have in front of me an AK you ride side mount ball bear slide and they still work great. This is a really good baseline for me. A nice upgrade however and one that I use in most of my house is an undermount drawer slide so we get a little bit wider of a box. It also has a soft close feature so the drawers don’t slam shut and damage your custom cabinets. The next thing I want to talk about is installing. This is something that really separates my from some of my competitors. I’m still looking at the same custom cabinets from earlier. They are well crafted but installed pretty traditionally. Where theses custom cabinets hit the floor we’ve got a shoe mold to hide that joint and where the custom cabinets hits a wall we’ve got another molding there. This is called a scribe mold or a screen mold. So these custom cabinets when they are put into place need something to hide those joints. So I have a question. What if you didn’t want those joints the way to do that is to build the custom cabinets box a little bit bigger especially where it hits the wall and then use a compass and scribe that cabinets to the wall so that that cabinet actually fits like a hand in a glove just perfectly in place. When you do that you don’t need any additional moldings. Same goes with the end panel on these custom cabinets. It’s been made a little bit long and then the cabinet installer when he’s on site is scribing it to the floor that way we’ve got a perfect fit. Your architects really going to like that as an option. The last thing I want to talk about is shop finishes. I’m a big fan of getting these custom cabinets finished at the cabinet maker shop and delivered to my site totally done. In the years past when I’ve used the painter to paint cabinets we got a good finish but we didn’t get a fantastic finish. It just doesn’t hold up long term. So I recommend checking out a good cabinet shop that can finish those custom cabinets for you. Protect them really well once they get installed and then you’re really going to have a top-of-the-line extraordinary cabinet.
The custom cabinets I am starting with right now are twenty-five and five eighths and I want to have a little extra width. I want to hold 25 and 3/4. I’m looking at the back side of my custom cabinets so all of my rails need to be cut twenty and thirteen sixteenths. So the next step of my cabinets is to go over and set the miter saw at 20 and 13 16 so I get both those of those rails the top and bottom exactly the same length so our cabinets are level. Now that we have done that and have my stop set I go cgo ahead and prepare the board for an incision. Another crucial step that I want to do is make sure my angles are of ninety degrees and has a square end on the rails for the custom cabinets. So in order to insure that I am going to just take of a slither of the wood so I can put a square on it and make sure it’s strait. That’s when it’s time to slide the piece over. Make sure you don’t have any sawdust in the cutting bay of the table saw because that could obstruct the wood from making it a flat surface. My next step is my favorite step in building custom cabinets and that’s preparing for my pocket hole joinery. You first have to go by with your measurements of all of your wood for the custom cabinets and mark them with a sharpie so you will know where to drill and plan it out in your head so you know what you’re doing.
When I am drilling pocket holes into the boards to support my custom cabinets I put three holes in each join. This is not like other architects. Most people like to just do two in each but the way I look at it you might as well support your cabinets the best you can. The pieces I am putting together for my custom cabinets I am actually going to run each one of them threw a sander which is a great luxury. This is one of those things that is petty for the regular person to purchase but someone in this field of work should consider buying one if they don’t already have one. The biggest concern is that each board has the same thickness. If you do not have one you might just run it through a planer. Those little bench-top planers do fabulous job as well but there are just a little more difficult to manage. The smoother you have these pieces before you install them the easier it will be later when you have your custom cabinets put together. Even the short side of my boards are smooth which is one of the benefits of owning a sander and that is also going to make it fit tighter because there won’t be any imperfection in the wood so it can line up more strait. The only side I left rough is the opposite side of the short side that was smooth. There’s no need to do anything to this edge because when I run that flush trim router bite it’s going to shave off that edge anyway.
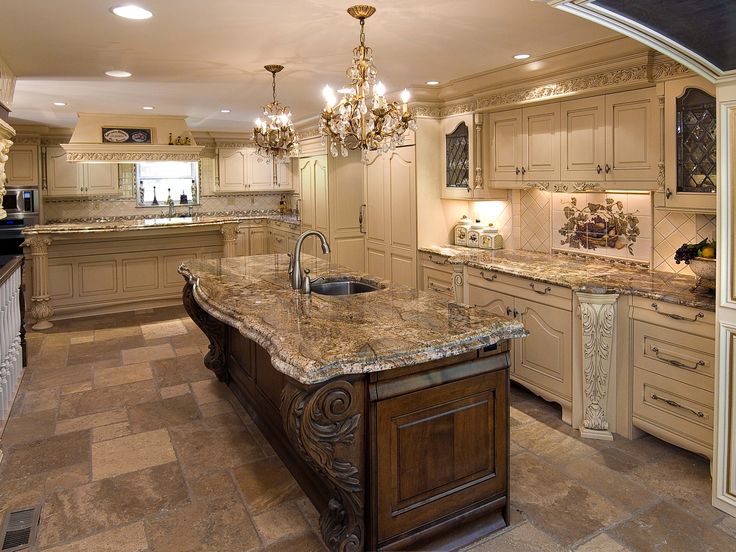
Are you wondering how to make a complex molding for your custom cabinets? Well this article I am going to explain how I do that and some of the different style you can choose from. I simply use some common router bits to achieve this. Do you ever observe one of those big fancy molding bits in the display case at the wood working store? I have tuned into pieces of custom cabinets like that because I can appreciate the amount of time the wood builder spent creating that work of art. Who has the money to spend on one bit for one molding? The only reason why someone would purchase that kind of bit is if they are a cabinet maker, like me. That is the benefit from choosing to go with someone in that carrier field. Today, I am going to show you how to make something you can be proud of with a smaller budget so you can still have an amazing set of custom cabinets. I am about to give you a rundown of how to do this with regular bits you have at home. It is going to be a crown molding such as you would find on the top of a piece of casework but it wasn’t made with a giant bit in a powerful shaping machine. It was cut with four bits you probably already have if you’re reading this deep into the article. Building custom cabinets isn’t always easy but the simple crown molding might give an RTA cabinet that nicer appeal you’re looking for. This simple crown molding is possible because it is created in layers which were then glued together to make the final molding. I’m going to elaborate on how it is made and then I will talk about how you can use the same principles to help you design your own for your custom cabinets. First you lay your style on a running table saw and run it through the circular spinner to create a quarter circle. Then you flip the bored on its back opposite to where you just made your first arrangement. This creates another partial circle within the style. Are you starting to understand how this is working? You can create shapes based upon circles. This make for nice edges to your new custom cabinets. Now there are many different types of molding you can get with the custom cabinets and different moldings look good with different cabinets. It all depends on what you’re looking for in your kitchen. With a vintage look you might want to get molding that is more extravagant but with a European look you might want to go simpler. Even though you will want to have a professional do the European style of the custom cabinet, the molding for it is actually something a normal mechanical type of person could do. Now for a vintage look you would need someone with the right equipment for the job. It isn’t too complicated for you to maintain it’s simply about your lack of necessary materials. If you do not get the necessary material and wood for the kitchen then you have to make more then one trip which is not only inconvenient for the customer but us as installers lose money on those mistakes. So it is important that that cabinet maker makes a check list before leaving to assemble the cabinets. Some of what a good carpenter does is analyze the job site as soon as he is giving the estimate and basis his estimate on the obstacles he foresees when putting together the custom cabinets.
"I am so glad I selected them to do my custom cabinets. I am a very particular person and I sincerely got what I wanted." Linda - Katy, TX
"My wife and I called a lot of different sales people from different companies and after much deliberation we decided to go with ya'll because we had the most confidence in the person who showed up to our house.Seemed like a very honest man and someone we could trust to give us new custom cabinets. After they completed everything I must say that I am glad we went with them and I highly recommend them for anyone else looking to have able cabinet makers work on your kitchen." Scott - Katy, TX
"We needed to remodel our kitchen and we wanted to have a clear understanding on how our custom cabinets were going to end up. Cabinets of Katy drew up a 3D concept that showed us our kitchen according to the living room. After sitting down with the cabinet maker and hearing what he had to say I felt confident the they were competent to work on my house." Kali - Katy, TX
"The custom cabinets I needed while I was giving my kitchen a remodel was not an ordinary job but the people here were very considerate and receptive to every need. My refurbished kitchen now looks jaw dropping. The custom work and molding around the top looks artistic. Thanks!" Cindy - Katy, TX
